I listed a couple of de-stash groups on Etsy tonight, but right in the middle of writing this post, all the beads sold! Well, here's what you missed:
 I'm making up more destash listings, so I'll be back with another post when those are ready!
Sunday, July 26, 2009
De-Stash Listings on Etsy
Friday, July 24, 2009
Tutorial: Gradient Background for Bead Photography
I was asked recently in an email what I use for a backdrop/background in my bead photos. The answer is simple: a white-to-black gradient printed on glossy photo paper.
I know many beadmakers already use this technique, but for those who haven't tried it yet, I've made a short tutorial on the process.
I have a Mac computer and I use Photoshop CS2. I think the Photoshop interface on a PC looks similar to the Mac version, so this tut will work for PC Photoshop users. If you don't use Photoshop, perhaps you can adapt this tutorial to the program you use for photo editing or graphics.
The instructions below include text followed by a screenshot of the step in Photoshop. Click to enlarge the images.
How to Make a Gradient Background in Photoshop
1. Create a "New Document" in Photoshop with the following attributes:
- Name: "gradient" or whatever suits you
- Width: 8 inches, Height: 10 inches
- Resolution: 200 pixels/inch
- Color Mode: Grayscale, 8 bit
- Background Contents: White
2. With your new document open, choose the Gradient Tool from the tools palette. Also, make the background color white and the foreground color black.
3. Using the Gradient Tool, click at the top of the document window and drag straight down about 2/3 of the way and let go. A gradient that fades from black at the top to white at the bottom should appear on the document.
It should look like this:
4. Save your document as a .psd or something that will preserve the high resolution. DO NOT save it as a .jpg, that is too low-res and will make an un-even, pixelated gradient when it's printed.
5. Printing the document
In the print options, under "Print Settings" choose:
- Media Type: Premium Glossy Photo Paper
- Color: Black
- Mode: Advanced
- Print Quality: Best Photo
(Or whatever the similar settings are on your software)
Here is the kind of photo paper I've been using recently. I bought it at Office Max: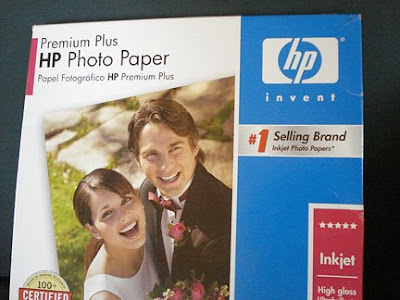
A note about printing:
I have noticed that some brands of black printer ink are not truly black. It's similar to how Effetre Black glass is not really black, but a very dense transparent purple. The same must go for when ink companies try to manufacture the ever-elusive black: they have to make it a densely pigmented version of some color or colors. Because of this, my gradients sometimes turn out with a greenish or reddish cast in the "black" area. This is very frustrating. There are a few things that can be done:
- Try a different brand of black ink next time you need to change cartridges.
- Take your photos anyway with the slightly tinted background, and make the adjustments to the tint when you are doing your bead photo editing.
- Scream, lament over the expense of the wasted photo paper and ink, give up completely, and go make beads.
If anyone knows how to solve this vexing black ink problem, I'd love to hear what works.
Variations on the gradient:
- Try clicking and dragging the Gradient Tool half-way down or all the way down the document window to change the length of the gradient, which will either add more black or more white area.
- Instead of a white-to-black gradient, try white-to-green, white-to-purple, or some other color combination to make a colored background for your beads.
- Place the beads near the center of the gradient page when you are photographing them, where it is fading from white to black. Or, put them on the white part for a pure white background or on the black part for a darker background.
Care for the printed gradient:
Gradients printed like this tend to scratch and stain easily. Take care with it. Expect that you may need to print another one up every few months or so when the old one gets too many scratches.
I hope you enjoyed this tutorial. I think it's the first one I've ever made. I had fun. Good luck with your bead photography!
:)
T-218 Accent Beads
A favorite Double Helix odd lot glass of mine is T-218. I'm not sure which production glass Double Helix considers it an odd lot of, or whether it's called a "test batch," but I think of it as an odd lot of Terranova. It strikes in a very similar way, only it strikes faster. It takes only short cycles of heating and cooling to bring the amazing colors out of this glass.
I've made a simple set of accent beads from T-218, and they're available in my Etsy shop: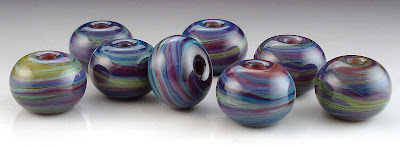
Here's a previous post I've written about T-218:
http://beadabundant.blogspot.com/2008/10/odd-lot-t-218s-and-triton.html
The post features some beads I made with T-218 and Triton, pictured below. For some reason I didn't get the bright colors out of the T-218 in this set, but I like its earthy tones anyway: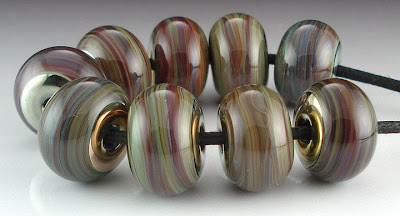 Now I'm thinking that the reason they don't have the bright colors is because my striking skills weren't as good back then. I've found that with striking glass in general, whether it's Terranova, Luna or Terra, etc., the bead has to get VERY COOL before it goes back in the flame for striking. I let it get very cool during each cooling cycle, and for the heating cycle I twirl the bead far out in the flame (8 inches from the torch face) so the surface heats up slowly and I can keep a close eye on the progress.
Keep having fun and have a nice weekend :)
Thursday, July 23, 2009
How Many Beads in a "Set"?
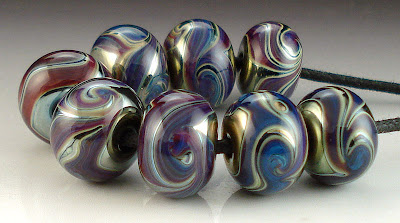
I've made a poll on the right-hand side of my blog. I'm asking you the reader how many small-sized beads you like to see in a "set." I'm not talking about simple spacer beads, more like the small beads I make that are decorated with swirls or scrolls, etc., like in the photo above.
I've gotten two responses so far, and I'm amazed at the feedback. Both responses call for even numbers of beads in a set. I generally make an odd number of beads in my sets, like 7 or 9.
This question has been asked before on the Lampwork, Etc. forum, but I couldn't find the old thread (if anyone knows, I'd love the link). I'm asking you now here on my blog, because I'm curious about what jewelry makers are looking for. I don't make as much jewelry as I used to, so I'm really out of the loop when it comes to what jewelry designers like to buy. Thank you to the people that left feedback on the poll, I really appreciate it. If you haven't voted yet, please do! Or leave a comment on this post.
Friday, July 17, 2009
Etched Scroll Design Beads
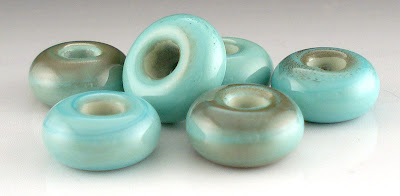
I have a few new bead sets made that I'm working on photographing and listing on Etsy. Here's a preview of one of the sets, made with a base of CiM Canyon de Chelly and scrolls of Effetre Copper Green. I love the reaction between these glasses! I've etched them to brighten up the Copper Green and reveal the nice dark lines around the design: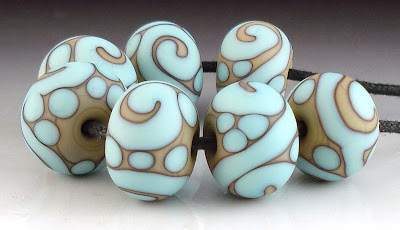 I find most of the CiM glasses, like Canyon de Chelly, are a dream to work with. They have a really nice, smooth consistency, like butter or soft taffy. Effetre's Copper Green is a long-time favorite of mine, either etched or un-etched. Here is an example of un-etched Copper Green, with the grey metallic patina still on the surface:
Today I travel down to Phoenix, about a 2 hour drive. I'm picking up my 14-year-old daughter at the airport who is just returning from canoeing camp up near International Falls, MN. I bet it's a heck of a lot cooler up there than it will be in Phoenix today. According to the forecast it should be 112 degrees. At least that's cooler than last weekend when I was in Phoenix and it was 114. Ha ha. I know there's a lot of torchers down in Phoenix... how do you folks do it? Even up here in Sedona, it's not cool enough to make beads until 9 pm!
Ok, enough complaining about the summer, which I longed for all last winter. Time to enjoy this 'dry heat.'
Have a wonderful day and weekend, and stay comfortable :-)
Thursday, July 9, 2009
"Stormclouds" Bead Set
"Stormclouds" on Etsy:
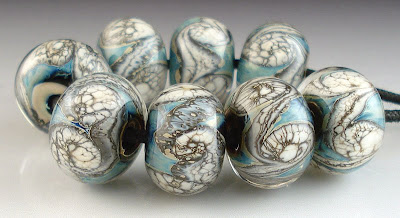 These were made with a base of Triton and Ivory, swirled together and then encased with Aether clear from Double Helix. I love the organic reactions between the Triton and Ivory!
What I'm Working On
I've been working on a new website and an online shopping cart. I build my own website using Dreamweaver, and I've signed up for an online shopping cart with BigCartel. The shopping cart will be part of my website. Here's a screenshot of my new website in progress: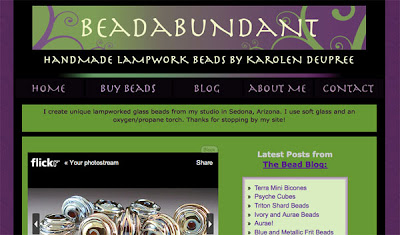 And here is a screenshot of my new shopping cart. I'm customizing the colors to match my homepage:
 I have been wanting to re-do my website, make it easier to update, and I've been searching a long time for a website shopping cart that will actually work for me.
I am really glad I found BigCartel. I recommend it for anyone who wants to set up another online shop besides Etsy or Artfire, etc. BigCartel is just a stand-alone store that you'd have to link to from your own website, blog, etc. They are not a venue in and of themselves like Etsy and Artfire are. For a flat monthly fee - or free - you can set up an online store with all the bells and whistles. Check them out.
I'll certainly post here on this blog when the new website is up and running.
Have fun!
Wednesday, July 8, 2009
Terra Mini Bicones
Here is a set I had fun making - Terra mini bicones:![]() These are in my Etsy shop right now.
These are in my Etsy shop right now.
When Terra turns out nice for me, it makes me happy that I still have a little stash of it. On other days I get so frustrated with it that I'm ready to sell it all in the Garage Sale! These beads worked well because the Terra had time to strike through the colors while I was heating it and marvering the shape. I like the way they turned out.
***** Isn't it wonderful to be alive on Earth right now? I think so :-)
Psyche Cubes
I just put this set of cubes up in my Etsy shop:
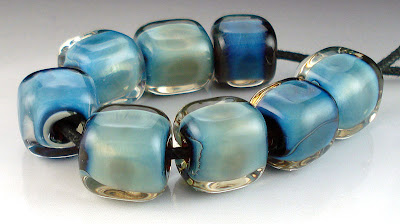 They're made from Psyche glass and encased with a layer of clear. Each bead is hand shaped.
I find the cube shape to be very challenging, but with practice it's getting a little easier. Anyone have any tricks on hand-shaping cubes they care to share?
Tuesday, July 7, 2009
Triton Shard Beads
Once again it's been ages since I've blogged! I thought I'd put a picture up of my latest bead set. These are made with Triton glass as a base, then covered with shards made from Triton Odd glass: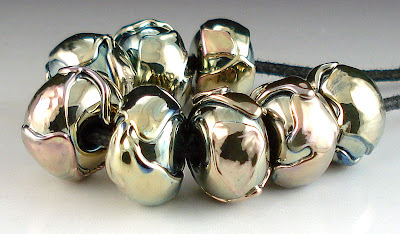 The set is in my Etsy shop right now.
I've written two posts about making shards, you can read them here:
Shards, Pt. 1
http://beadabundant.blogspot.com/2008/12/shards-pt-1.html
Shards, Pt. 2
http://beadabundant.blogspot.com/2008/12/shards-pt-2.html
Happy beading everyone :)
